Studio
Introducing Graph.Build Studio v3.2
graph.build Studio v3.2 is a major update that expands the platform’s capabilities for designing, transforming, and managing both semantic (RDF) and...
This is a step-by-step example of how to create a knowledge graph model, or any other graph model, using the Graph.Build no-code Studio solution.
In this guide, I’ll run you through the creation of a model based on some sample data using the Graph Build Studio user interface, and then using this model I will run through some of the core features and functionality of the Transformers. At the end of these steps, the model will be ready to publish to any popular graph model database.
In this example, I am running an instance of Graph.Build Studio on my local machine along with two instances of the Transformers - one SQL Transformer and one Semi-Structured Transformer. If you prefer, these can also be run in any cloud environment as they're all simply Docker images.
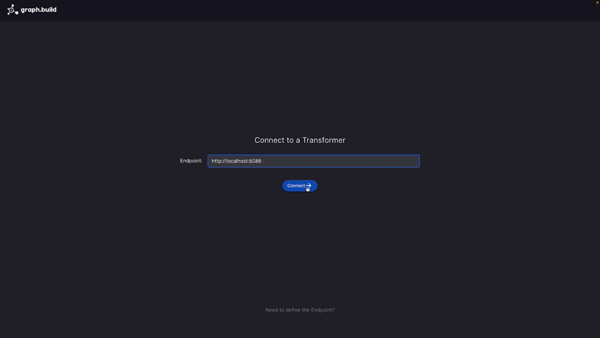
For the first step, I connect the Studio to one of my Transformers by entering its endpoint and its IP address and then hitting ‘connect’. This then takes me to the main screen from where the model is constructed. In this example I’m going to use a SQL database source and so I am connecting the SQL Transformer. Later on I will add another source from flat-files using the Semi-Structured Transformer.
Because Studio is a collaborative tool, I can see here a previously constructed model. In your case this could either be created by you or from another member of your team. All previously saved models can be found in the save drop down.
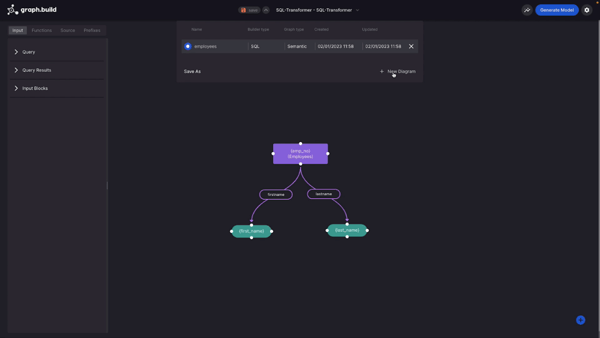
At this stage I am going to create a new diagram. When creating a new diagram, I have the option to reuse some of the configuration in a previously created model. This includes things like prefixes as well as SQL database credentials.
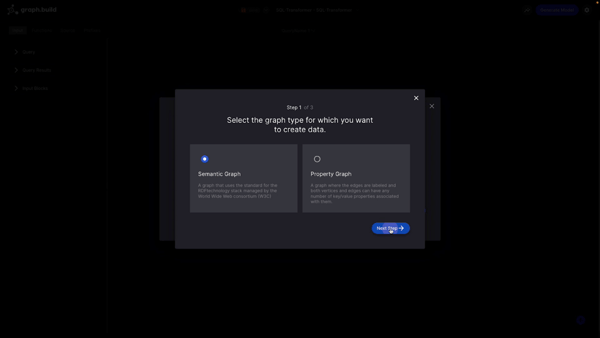
In this first step I’m asked the graph type that I want to create data for. All Graph Build tools support both Semantic Graphs and Property Graphs.
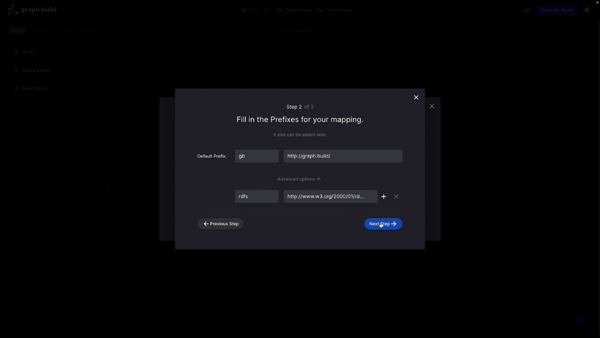
The second step asks me to fill in the prefixes for my mapping. I can add any additional prefixes, in addition to the default, at this stage. The Studio has a list of commonly used ontologies which have been loaded in. So for example, if I select RDFS, the namespace is automatically populated.
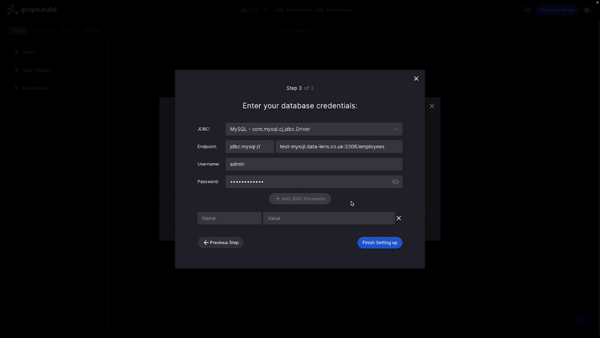
In final step, I'm asked to fill in my SQL database credentials. The SQL transformer supports a wide array of sequel database providers including MySQL, SQL server, Oracle, and many more. In addition to the credentials, you can also provide additional JDBC parameters if required.
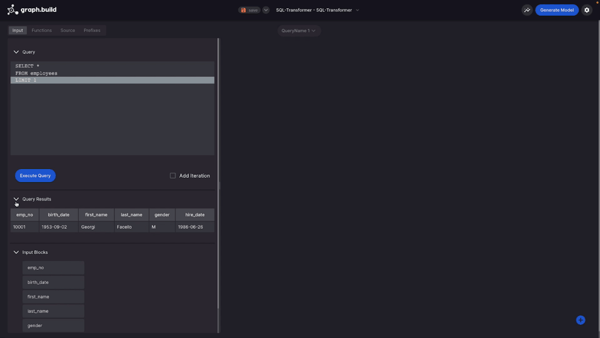
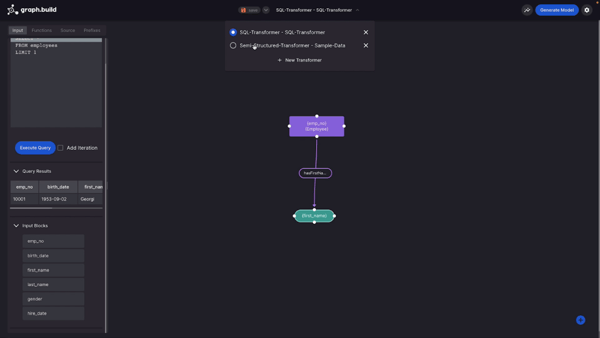
Now that I’ve finished the setup, I’m returned to the main screen from where I can create my model. The first thing I then do is run a SQL query to return some data from which I want to construct a model.
When I run this simple query, I can see in the tab below, the results of this query in a tabular format. However, more importantly, in the subsequent tab, I can see the input blocks which I’ll use for the construction of the model itself. These are simply based on the column headers in the returned data. After bringing in this data, I start to build the model.
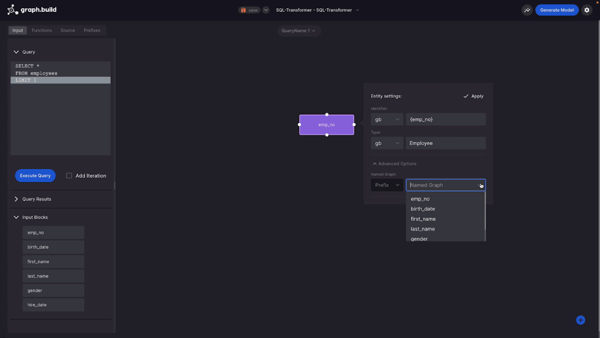
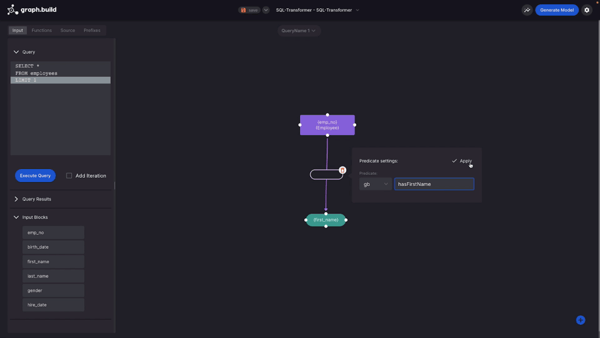
To begin with I’m going to create an Entity using the table’s unique identifier, “Employee Number”. I do this by dragging, dropping and selecting “Entity”. I then provide the prefix and create the Entity. If you like, you could also provide a class type. There are also additional options that you can provide, such as Named Graph. You can enter these manually or provide them from the data set.
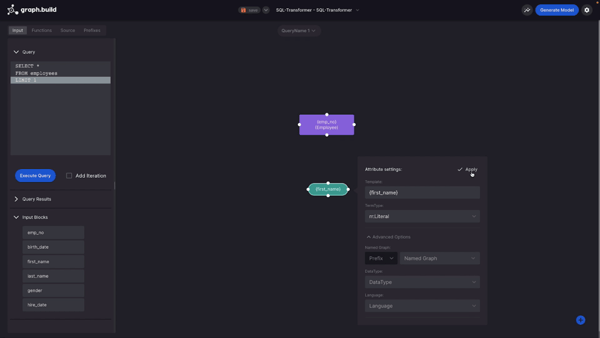
The next thing I’m going to create is an Attribute. In this example I use “First Name” and I just drag, drop and select as before.
For attribute settings, I also have the template from the column header. I have a term type, which can be a literal, blank node or an IRI. And then I also have some advanced options such as, named graph, data type, and a language tag.
I’m now going to create the Predicate. I do this by creating a link between my Entity and my Attribute, but you could also do it between an Entity and an Entity, providing your Predicate name.
So now I have a very basic visualisation, I will generate my model by hitting the Generate Model button. In the background, the Studio now generates a mapping based on my visualisation, using the open standard RDF Mapping Language, or RML (this is used to define my rules to map data).
At this stage, if you are an advanced user, it’s worth noting that you can go in edit the RML as you wish, as it is an entirely open standard. In this example, I’m going to stick to the no-code option using the simple drag-and-drop interface.
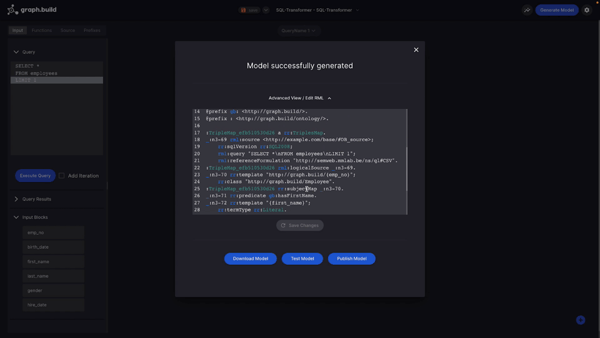
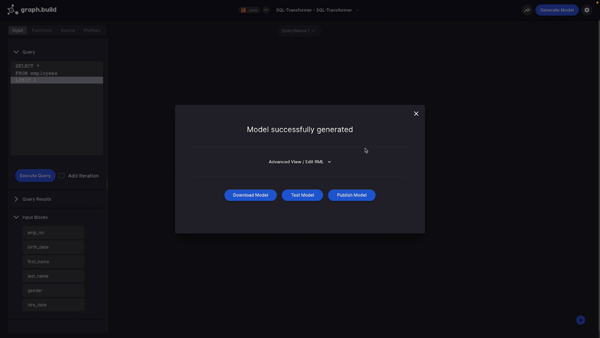
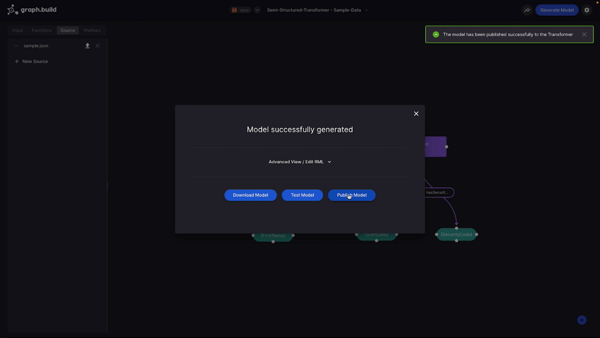
When the model is generated, I’m given the option to do one of three things:
1. I can download the model which will save the mapping file to my local machine;
2. I can test the model or;
3. I can publish the model - this option would push the constructed mapping to my Transformer for use in production.
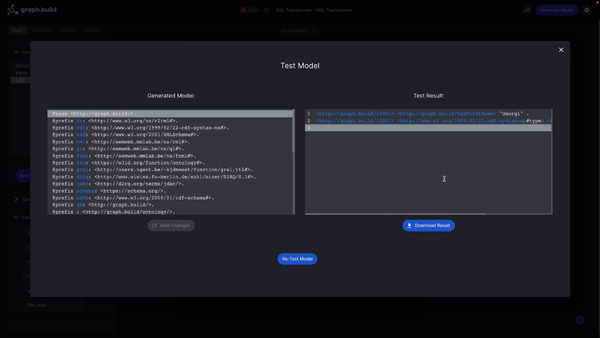
If I opt to test the model, the Transformer uses the model to ingest my SQL dataset and transform it against the mapping that I created.
When this is done, the resulting RDF appears in the right hand pane. This contains the first name predicate as well as the type, all of which can be downloaded as an RDF file.
If I click on the publish option, the model is pushed to the transformer so that it can be used in production or with larger datasets.
Modifying this Example to use Semi-Structured Flat-Files as a Data Source
I’m now going to complete the same process with a Semi-Structured Transformer. The Transformer drop down in the top navigation bar shows us a list of previously connected to Transformers.
In this example, I save the model (in case I want to refer to it later) and then reconnect to my semi structure transformer.
Now that I've connected to our semi structured transformer, I can see this model that was created earlier.
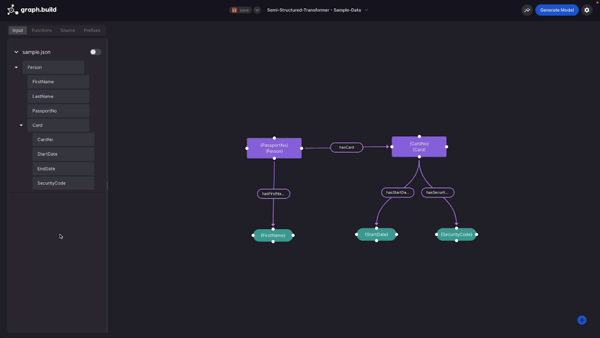
As with the SQL transformer example, this was created using the draggable blocks in the left pane based on my source data. The difference with this Transformer is where I get my source data from. Instead of a SQL dataset, I’m using semi structured flat files, so I need to create a new data source.
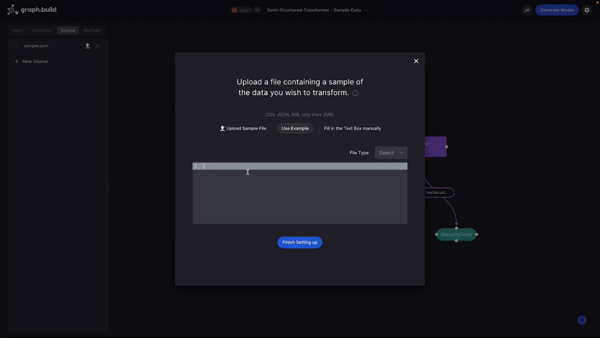
I can create this new data source in one of three ways:
1. I can upload a sample file from my local machine;
2. I can select from one of three sample files provided or;
3. I can enter the data manually in the text box.
Next, I generate a model for this visualisation as I did in the SQL data source example and follow the same steps.
Now that my transformer has the model stored, I can go ahead and execute a real transformation with a larger dataset. I do this by selecting the ‘Execute Transformer’ button and entering the URL of my input file.
For the remainder of this example, I’m going to be using the Semi-Structured Transformer. I have provided a large JSON file which is stored in Amazon Web Services S3. I also need to provide the model to which the dataset references.
If you like, you also have the option to provide a specific mapping file which will be executed with this transformation. For this example, I’m going to leave it as default which will execute the transformation using all mappings provided.
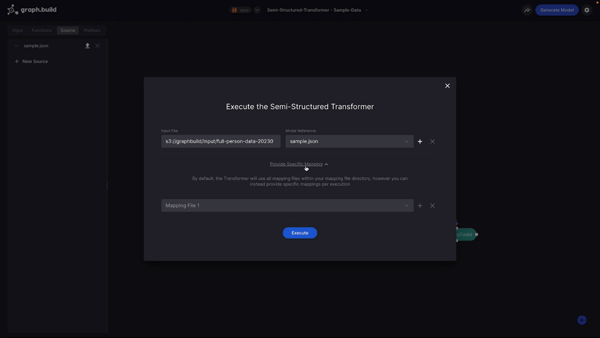
I now hit ‘Execute’ and the Transformer starts the transformation of my source data. Upon completion I receive a transformation report, in which I can see the list of generated RDF output files. I can see that it has constructed one output file which is being stored in S3, which has been configured as the output directory in our Transformer.
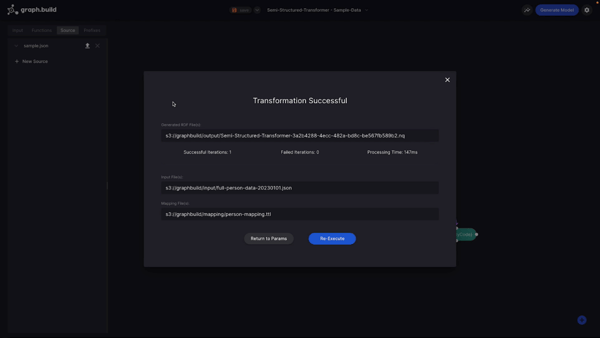
I’ve now completed the building of my graph model.
graph.build Studio v3.2 is a major update that expands the platform’s capabilities for designing, transforming, and managing both semantic (RDF) and...
Graph.Build have released version 2.1 of the Graph.Build Studio - featuring RDF Data Synthesization, Enhanced Features for LPG, and Model Import /...
Two approaches dominate the conversation about working with data: graph virtualization and graph materialization. Graph.Build provides the...